+86 88802688 ylj@gd-ylj.com ![]() +86 13670608306
 +86 13670608306

Views: 273 Author: Zora Publish Time: 2026-11-10 Origin: Site
Content Menu
● Why Does Protective Film Leave Sticky Residue on Aluminium?
● Identify the Aluminium Finish Before Removing Protective Film
● Tools for Removing Protective Film from Aluminium Profiles
● How to Remove Protective Film from Aluminium Profiles: Step by Step
>> 1. Check the Film's Age and Exposure History
>> 2. Work on a Cool, Shaded Surface
>> 3. Remove Loose Dirt Before Peeling
>> 4. Lift a Corner Without Cutting the Finish
>> 5. Peel Slowly and Keep the Film Close to the Surface
● How to Remove Sticky Residue from Aluminium Without Damaging the Finish
>> Start with Mild Soap and Water
>> Test a Finish-Approved Cleaner
>> Clean Small Areas and Remove the Cleaner
● Should You Use Heat, Alcohol, Acetone, or Adhesive Remover?
● Troubleshooting Old or Sun-Damaged Protective Film
● A Better Site Procedure: Approve One Trial Before Cleaning Everything
● Prevent Adhesive Residue Before Shipping and Installation
● Discuss Profile Finishing and Protection with YLJ Aluminium
>> Can I use alcohol to remove adhesive from aluminium profiles?
>> How long can protective film stay on aluminium window frames?
>> Is a heat gun safe for removing old protective film?
>> Why is the surface still marked after the stickiness disappears?
>> Can I scrape residue off powder-coated aluminium?
To remove protective film from aluminium profiles without leaving sticky residue, start with a cool, clean surface, lift one corner, and peel slowly while keeping the film folded back close to the profile. If adhesive remains, use only a cleaner approved for the specific finish, test it in a hidden area, and rinse thoroughly afterward.
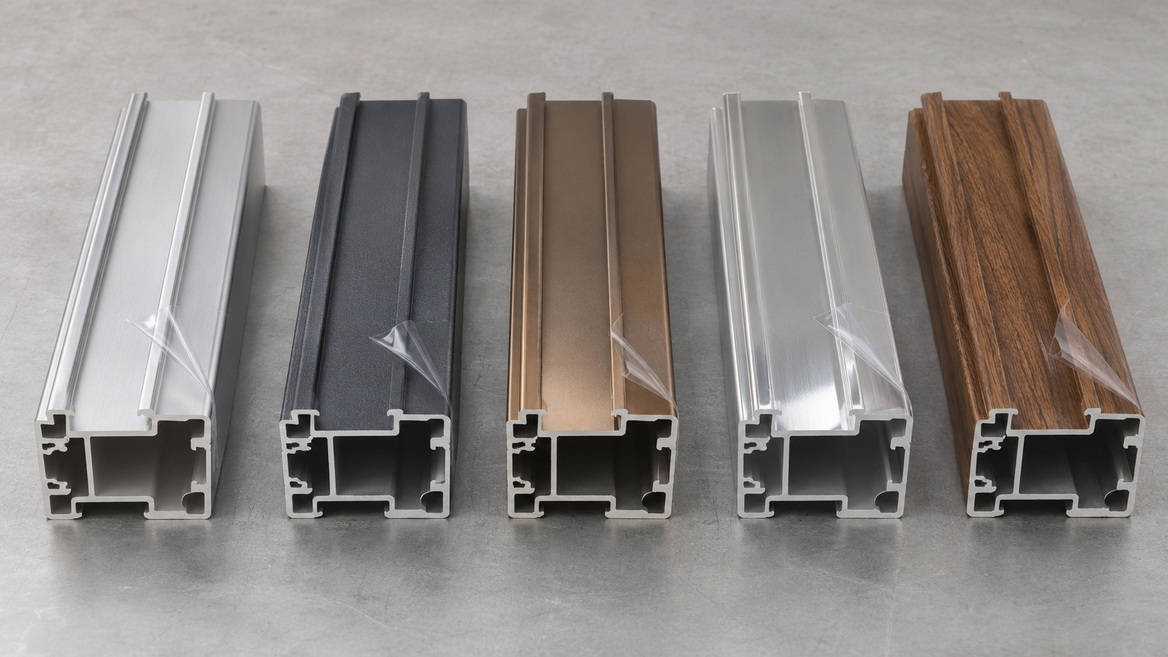
The important distinction is that you are cleaning a finished surface—not simply a piece of metal. Anodized aluminium, powder coating, PVDF coatings, electrophoretic finishes, and wood-grain finishes may require different precautions.
At YLJ Aluminium, our manufacturing perspective is straightforward: protecting the finish matters more than removing the film quickly. This guide explains a controlled approach for installers, fabricators, procurement teams, and homeowners.

Protective film must balance two requirements: staying attached during handling and releasing cleanly when protection is no longer needed.
Residue appears when that balance breaks down. The adhesive may remain on the profile instead of separating cleanly with the film.
Common contributing factors include:
- Extended application beyond the film supplier's recommended removal period.
- Outdoor exposure exceeding the film's stated weathering limits.
- Heat and sunlight during storage or installation.
- An adhesive unsuitable for the particular surface.
- Removal conditions outside the supplier's instructions.
Not all protective films have the same outdoor service life. Some products are designed for extended exterior exposure; others are intended for indoor processing and transport.
A removal period stated for one product should never become a general rule for every aluminium profile.
Before choosing a cleaning method, check the order specification, finish certificate, or manufacturer's maintenance instructions.
Appearance alone is not enough. A metallic-looking profile may have a clear coating, while a decorative wood-grain surface may involve multiple finishing layers.
| Profile finish | Recommended starting point | Main precaution |
|---|---|---|
| Anodized aluminium | Water, followed by mild detergent if needed | Avoid aggressive acidic or alkaline cleaners |
| Powder-coated aluminium | Mild soap, water, and a soft cloth | Obtain approval before using solvents |
| PVDF-coated aluminium | Follow the coating supplier’s cleaning instructions | Do not assume every solvent is acceptable |
| Electrophoretic finish | Confirm the manufacturer’s maintenance procedure | Treat an unidentified clear layer conservatively |
| Wood-grain finish | Use the finish supplier’s approved method | Test for color, gloss, and pattern changes |
| Unknown finish | Identify the finish before chemical treatment | Do not escalate through trial and error |
Where a clear topcoat is present, cleaning restrictions can be more conservative. Until the coating is identified, use only mild soap and water.
Prepare the work area before peeling:
- Clean microfiber or other soft, lint-free cloths.
- Clean water and a mild detergent.
- A container for diluted cleaning solution.
- Suitable gloves and eye protection for any approved cleaner.
- The film supplier's technical instructions.
- The aluminium finish manufacturer's cleaning guidance.
- A container for removed film and used cleaning materials.
Avoid razor blades, wire brushes, steel wool, abrasive pads, and metal putty knives. These tools can turn a removable adhesive problem into permanent surface damage.
Do not begin with a heat gun or a strong adhesive remover simply because they are available.
Find out when the film was applied and whether the profiles were stored indoors, transported in hot conditions, or exposed on site.
Check the film's identification and removal deadline where available.
If the history is unknown, start with a short, inconspicuous section. This reveals whether the film releases normally, stretches, fragments, or leaves adhesive behind.
Avoid cleaning aluminium that is hot from direct sunlight. Architectural aluminium maintenance guidance recommends cleaning shaded surfaces rather than sun-heated metal.
Allow the profile to cool naturally.
Also check for nearby sealants, gaskets, glass, and drainage openings. An approved cleaner for the metal finish may not be appropriate for every adjacent material.
Gently remove loose dust and grit around film edges.
If necessary, clean exposed areas with mild soap and water, rinse, and dry. Do not rub trapped construction grit across the finish.
This matters particularly on window frames and curtain wall profiles, where cement dust or other debris may collect along film edges.
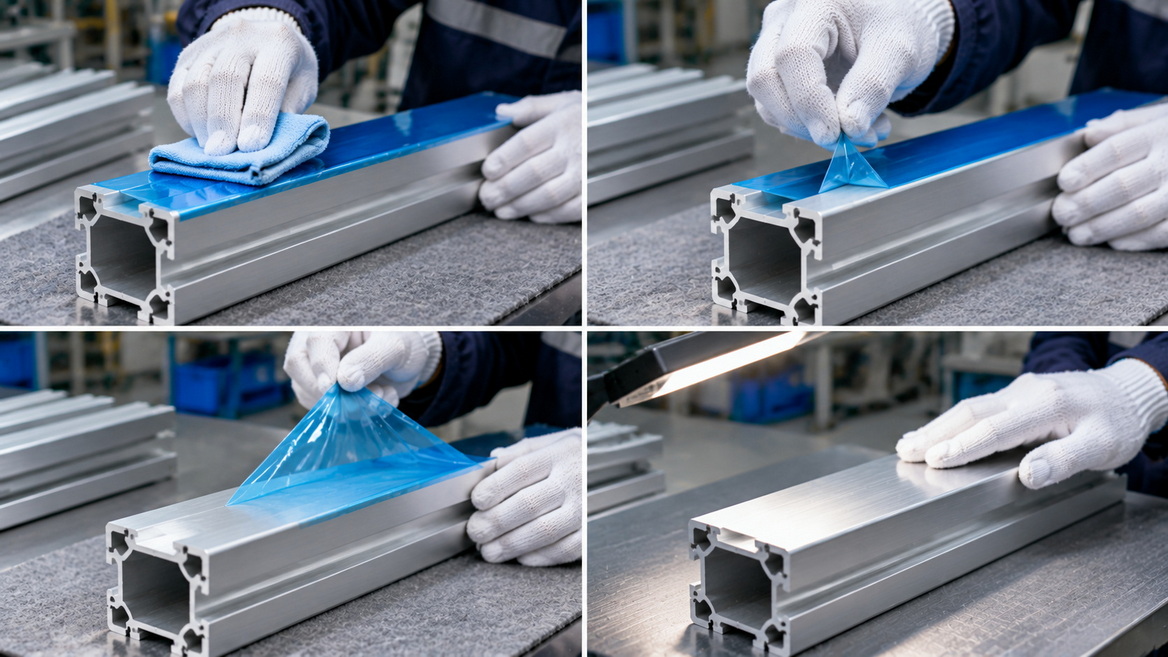
Try lifting an existing film edge with your fingers.
Do not score through the film with a blade while it is attached to a visible surface. A small cut can penetrate the coating and remain visible after installation.
If no edge can be lifted safely, stop and ask the supplier for an appropriate release method.
Fold the released film back toward itself and pull steadily, keeping it close to the profile rather than jerking it straight outward.
Use this as a controlled starting technique; the film manufacturer's specified removal method takes priority.
Work in manageable sections. Support long or lightweight profiles so they do not twist while you pull.
Watch the newly exposed surface. If peeling produces increasing resistance, repeated tearing, adhesive strings, or coating lift, stop rather than applying more force.
Check whether the remaining mark is actually adhesive.
A sticky patch may be glue, but a visible outline can also indicate uneven soiling, surface alteration, or a difference in weathering between covered and uncovered areas.
Inspect under angled light and compare the affected area with an untouched section.
Do not assume that stronger solvent will remove every film-shaped mark.
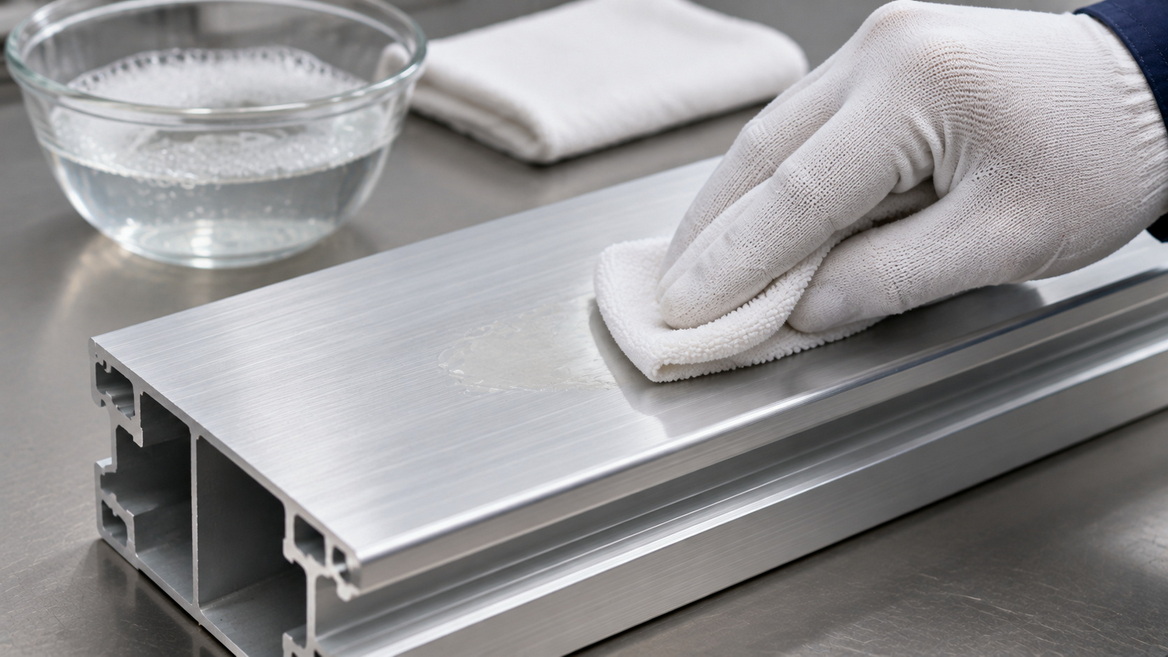
Wash a small affected area with mild detergent and a soft cloth. Rinse with clean water and dry.
This may not dissolve every adhesive, but it removes dirt and helps establish what remains.
Keep pressure light. Repeated aggressive rubbing can change the appearance of a decorative finish even when the cleaning product itself is mild.
If residue remains, obtain approval for a specific cleaner from the finish manufacturer or profile supplier.
Finish compatibility is more important than a product's general claim that it removes glue.
Test the cleaner on a concealed area using the proposed concentration, contact time, cloth, and pressure. Inspect after drying for:
- Color transfer onto the cloth.
- Gloss reduction or a polished-looking patch.
- Whitening, staining, or discoloration.
- Softening, tackiness, or coating lift.
Do not proceed if any change occurs.
Follow the cleaner's instructions and safety data sheet. Avoid flooding joints, seals, drainage channels, or concealed cavities.
Use fresh sections of cloth so dissolved adhesive is lifted away rather than spread along the profile.
Complete the approved cleaning procedure, rinse where specified, and dry. Architectural maintenance guidance generally emphasizes thorough rinsing and avoiding cleaner accumulation.
Never mix cleaning chemicals.
These methods should not be treated as interchangeable shortcuts.
| Method | Practical assessment |
|---|---|
| Hair dryer or heat gun | Use only if the film and finish suppliers provide an approved heating procedure |
| Alcohol-based cleaner | Consider only with finish-specific approval and a successful hidden-area test |
| Acetone or lacquer thinner | Not a default option for finished architectural profiles |
| Commercial adhesive remover | Check compatibility with the coating and adjacent components |
| Mild soap and water | The preferred initial cleaning method for many architectural finishes |
There is no universal heating temperature or solvent recommendation suitable for every aluminium profile.
Some maintenance guidance permits limited solvent use under defined conditions. That does not establish blanket approval for all powder coatings, clear topcoats, seals, or decorative finishes.
When working with flammable cleaners, follow their ventilation, ignition-control, and protective-equipment requirements. Never combine solvent cleaning with heat.
Aged film requires diagnosis, not simply more pulling force.
| What you observe | Recommended response |
|---|---|
| Film breaks into small pieces | Stop repeated scraping and request a film-specific recovery procedure |
| Adhesive smears across the surface | Check cleaner compatibility and use clean cloth sections |
| Coating color transfers to the cloth | Stop cleaning and contact the finish supplier |
| Finish lifts with the film | Stop peeling and document the affected area |
| A non-sticky outline remains | Investigate staining or weathering rather than assuming residual glue |
Photograph the problem before further treatment. Record the profile finish, film identification, application date, storage conditions, and cleaning products already used.
For a large project, isolate a representative section for an approved trial. Do not apply an unverified remedy across an entire shipment.
For fabricators and installation contractors, a documented trial is more useful than informal instructions such as "use a little solvent."
Create a simple removal record containing:
1. Profile and finish identification.
2. Protective film product or batch.
3. Known storage and outdoor exposure.
4. Successful peeling method.
5. Approved cleaner and application instructions.
6. Before-and-after photographs.
7. Acceptance by the responsible project representative.
Inspect the trial after the surface has dried, under lighting comparable to final inspection.
This is a recommended quality-control workflow, not a claim that one universal test guarantees compatibility. Its value is traceability: everyone follows the same approved procedure instead of improvising different treatments.
The best residue-removal strategy starts before the film is applied.
Specify protection according to the actual finish, handling conditions, transport route, storage period, and expected outdoor exposure.
Ask the film supplier to confirm:
- Compatibility with the specific surface.
- Permitted indoor and outdoor application periods.
- Storage and removal conditions.
- Any restrictions involving heat, moisture, or chemicals.
- Instructions for delayed or difficult removal.
Mark removal deadlines clearly in project documentation. Remove temporary protection as soon as its purpose is complete, within the supplier's stated limits.
Where further construction work continues, arrange an approved alternative protection method rather than leaving expired film in place indefinitely.
Founded in 1986 in Foshan, Guangdong, YLJ Aluminium combines aluminium profile manufacturing with integrated finishing and fabrication capabilities.
Our company information identifies a 200,000-square-meter production base and 20 extrusion lines, supported by processes including anodizing, electrophoretic coating, powder coating, PVDF coating, and wood-grain transfer.
For your next architectural, decorative, or industrial project, contact YLJ Aluminium with your profile drawings, finish specification, destination, and installation schedule. Request confirmation of suitable protective-film options, removal timing, and finish-specific cleaning guidance before shipment.
Only when the finish manufacturer approves the particular product and application method. Test first. An alcohol-based cleaner suitable for one finish may be unsuitable for another coating or adjacent component.
Follow the film supplier's stated application period and exposure conditions. There is no universal deadline covering every protective film, coating, climate, and storage situation.
Do not use one without an approved procedure. Obtain film- and finish-specific guidance rather than selecting a temperature by guesswork.
The mark may involve staining, altered gloss, or differential weathering rather than remaining adhesive. Stop escalating the cleaner and ask the finish supplier to assess it.
Avoid metal blades and abrasive tools. Begin with mild cleaning, then use a manufacturer-approved adhesive-removal method if required.
1. Linetec. "Regular Cleaning Maintains Finished Aluminium and Its Warranty." Practical architectural-finishing guidance covering temporary film removal, mild cleaning, spot testing, rinsing, solvents, and prohibited tools. [linetec]
2. Fenestration and Glazing Industry Alliance. "AAMA 609 & 610-15: Cleaning and Maintenance Guide for Architecturally Finished Aluminium." Official publication description outlining the guide's scope for anodized and painted architectural aluminium products. The complete standard was not used as an accessible full-text source. [store.fgiaonline]
3. GRECO Architectural Metal Products. "Anodized Coating Cleaning Procedures and Maintenance." Guidance on shaded-surface cleaning, detergent use, rinsing, solvent precautions, and avoiding aggressive chemicals. [grecorailings]
4. tesa. "tesa® 4414: Strong PE Surface Protection Tape." Product-specific information illustrating that residue-free removal periods and outdoor exposure claims apply to defined products, not all protective films. [tesa]
5. tesa. "Effective Surface Protection for Industrial Applications." Manufacturer information on temporary protection, surface-specific selection, handling, storage, installation, and clean removal. [tesa]
6. YLJ Aluminium. Company background supplied for this article. Source of the company's establishment date, location, production-site area, extrusion-line count, and manufacturing capabilities; not independently verified for this article.


